How to Clean Leather Car Seats
Updated 10/13/23
It’s unfortunate how most motorists pay more attention to cleaning the exterior of their cars than the interior.
I was recently comparing two used cars. Both were 1996 Porsche’s. One had a black interior, the other had a tan interior. The way they aged was night and day. The black interior looked great, it was a little worn it, but looked good. The light tan interior looked aged, the cracks in the leather stood out in a big way. The Tan interior car had 16k miles, the Black interior car had 28k miles. I think this goes to show your choice of interior color will make a big difference in how you approach maintenance.
When it comes to the interiors, it’s only the dashboard area that is exempted because it is the part that a driver sees most, therefore it is always clean.
However, other areas don’t enjoy the same attention. One of the parts that are heavily neglected are the car seats.
Today, we are going to focus on how to clean leather car seats. There is no doubt that leather seats portray a sense of luxury and offer exceptional comfort.
Whether this seat design came with the car or you customized it yourself, taking proper care of it ensures that it serves you for longer and your interiors look visually stunning. Other than that, well-maintained leather seats increase the resale value of your car.
In the past, car manufacturers often used untreated aniline leather which was very hard to clean. Today, most cars feature coated and treated leather seats which are stain-resistant and easier to clean.
You’ve learned how to get the smoke smell out of your car now we’re going to learn how to clean your leather seats like a pro.
Products You Need
- A car vacuum
- A clean microfiber cloth
- Scrubbing brush with soft bristles
- A bucket
- A leather cleaner
- A leather conditioner
What to Do and Not Do
Although cleaning leather car seats is easy, there are some guidelines you need to adhere to.
Below is a list of the dos and don’ts of leather car seats, which will ensure you are doing it right.
The Do’s
- Do choose a quality cleaner. You can spot test it to confirm its suitability.
- Do vacuum the seats thoroughly before washing to prevent sand and grime from scratching your leather.
- Do clean on equal time intervals to prevent discoloring certain parts.
- Do use a microfiber cloth because it is gentle on leather.
- Do use a natural cleaner because it is safer and offers more satisfying results.
- Do embrace a habit of cleaning your leather car seats at least once a month and conditioning it after every three months.
The Don’ts
- Don’t start cleaning without knowing the type of leather you are dealing with.
- Don’t use a brush with hard bristles.
- Don’t soak the seats because too much liquid can damage the seat and facilitate the breeding of mold.
- Don’t apply cleaners directly on the leather. Use a microfiber cloth instead.
- Don’t use a cheap or low-end cleaner that won’t give satisfactory results.
Step by Step Guide – How to Clean Leather Car Seats
Step 1 – Start by Looking for Holes or Tears
The problem with having holes in your leather seats is that they will act as entry points of liquid. And you are definitely aware of how problematic this can be for the inner foam. This is why you should start by looking for tears or holes. When you find some, improvise on how to cover them. Or mark the spots so that you can be careful when cleaning surrounding areas.
Step 2 – Vacuum
Irrespective of the type of leather in your car, you should vacuum it thoroughly to remove dirt and dust. Pay attention to joints because this is where dirt often builds up. A wet/dry vacuum with a soft brush can be very effective.
Step 3 – Identify and Remove Surface Dirt or Stains
There will be a couple of stains or areas which are too dirty. Before you can start the thorough cleaning, identify and remove surface dirt. You can use a leather cleaner and microfiber cloth to remove stubborn stains.
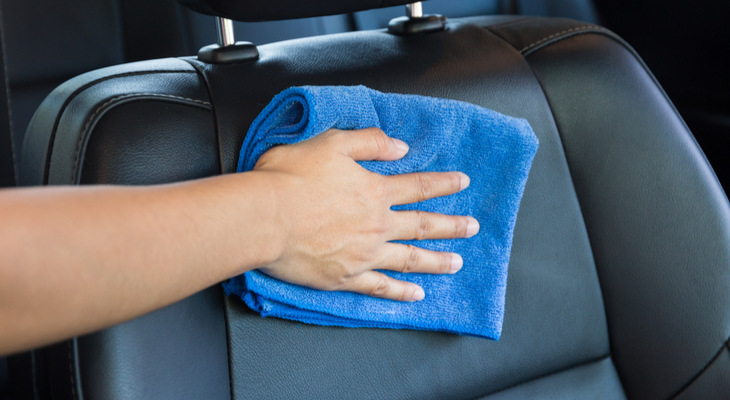
Step 4 – Scrub the Seats
Having done all the above, you can now get to scrubbing. With the help of a brush with soft bristles, scrub all surfaces on the leather seat. Do it thoroughly and gently to avoid scratching. After scrubbing, you can use a microfiber cloth to wipe away the dirt. Repeat this process until the seats start looking brighter and cleaner.
Step 5 – Condition Your Leather Seats
Over time, leather tends to dry and crack out. The benefit of conditioning is that it adds moisture and natural oils which makes the surface softer and suppler. Invest in a premium leather conditioner. The drawback of using cheaper conditioners is that they can leave your seats looking greasy or even ruin the quality of your leather seats.
You should also avoid using leather conditions that contain petroleum, wax, or silicone. A water-based product is gentler on your leather. Also, getting one with sunscreen can help protect your seats from sun damage and prevent fading.
Using too much conditioner can make the leather look greasy. You should aim for a more balanced touch. This can be achieved by sparingly adding the conditioner to a microfiber cloth, then rubbing it on the seat.
Step 6 – Let It Dry
After thoroughly cleaning and conditioning your leather car seats, you should allow it to dry for at least 12 hours. Your seats will dry better when you park your car in a shady area. Direct sunlight can make your car dry faster but the UV rays can do more harm than good.
Step 7 – Buff It Up
Now that your leather seats have dried up, you can buff it up with a dry microfiber cloth. Wipe off excess conditioner that was left behind, polish the seats, take a step back, and admire your hard work.
Cleaning Perforated Leather Seats
A lot of car manufacturing companies prefer using perforated leather on seats. This is because it is not only aesthetically pleasing but allows air to pass through, facilitating the heated seat feature. Unlike other types of leather, perforated leather seats require a unique cleaning approach.
The presence of perforations on the seats requires minimal liquid use. Therefore, you shouldn’t apply the cleaner directly on the seat. You should add it to a brush or cloth then proceed to clean the seat. Should you happen to pour a lot of liquid, you can use a car vacuum to dry it up.
When conditioning perforated leather, you should also use it in smaller amounts to avoid blocking the holes. Nonetheless, the above steps should also be used when cleaning perforated leather.
Bottom Line
Cleaning your car’s leather seats has never been easier. Using natural cleaning agents such as vinegar and water can prolong the life of your leather.
Don’t forget that the longer you take to clean leather, the sooner it loses its aesthetic appeal. When marking your calendar, set aside time to clean your leather seats regularly.
You should develop a habit of cleaning the seats whenever something spills on it. Be very keen when choosing a cleaning product and conditioner. These products play an important role and the likes of conditioners should be used sparingly to avoid greasing.