How to Change a Flat Tire
Understanding the basics on how to change a flat tire is one of the essential keys to driving safely to your destination and back.
Even though calling a family member, a friend or AAA to the scene is just a phone call away, unexpected events like leaving your cell phone at home are always a scary possibility.
Keeping these and other similar situations in mind, here is what you need to know about how to change a flat tire.
Tools Needed to Change a Tire
Before you leave home, check your vehicle for the following basic items.
- Spare Tire
- Jack
- Lug wrench
- Owner’s Manual for Your Vehicle
- Tire Handling Gloves
- Wheel wedges
Step-by-Step Guide
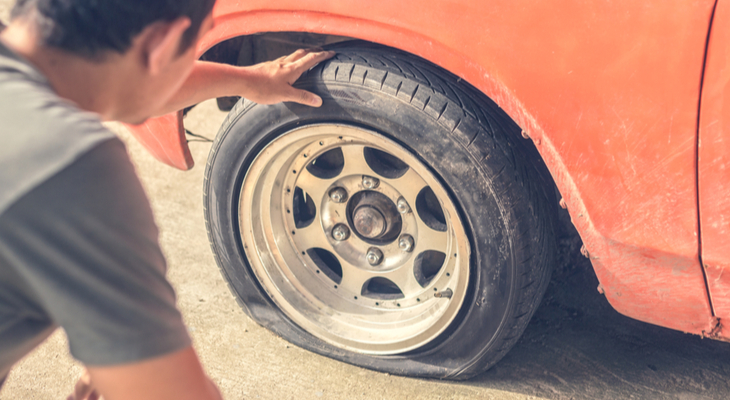
1. Find a Safe Location
If you suspect that you have a flat tire, pull safely to the side of the road. The ideal location to change a tire is a parking lot on level ground. Or, a wide shoulder that provides a lot of room away from oncoming busy traffic.
In either situation, always position your vehicle in a place that other drivers can easily see you. Do not be afraid to damage your rim, a mutilated rim is preferable to causing a serious injury accident or a fatality.
2. Turn Your Hazard Lights On
As soon as you suspect that you have a flat tire, turn on your hazard (flasher) lights. These lights are designed for your protection in any emergency situation.
3. Apply Your Parking Brake
After you have found a safe location to change your tire, apply your parking brake. Your parking brake will prevent your car from rolling while you are changing your tire.
4. Strategically Place wheel wedges if needed
To add an additional layer of security, place a wheel wedge behind the appropriate tires. These wheel wedges will also help to minimize the possibility of your vehicle rolling back.
For instance, if you are changing a flat tire in the front of your vehicle, place the wheel wedges in the back of the rear tires. Or, if you are changing a flat tire in the rear of your vehicle, place the wheel wedges in the front of the front tires.
Additionally, before moving forward in this process, put on your pair of tire handling gloves. These gloves will give you outstanding abrasion resistance and a sure grip when you are changing and handling your tires. Use these gloves when you are rubbing off debris and rocks from the runs of the tires.
5. Remove the Wheel Covers or Hub Caps
To make it easy to remove the lug nuts from your tires, remove your hub caps first. The process of removing your hub caps can differ from one vehicle to the next so you will need to read your owner’s manual for accurate instructions.
In general, for most vehicles, you will most likely use the flat end of your lug wrench to pull the hub cap off or your tires.
6. Loosen all of the Lug Nuts on the Flat Tire
Once you have removed the hub cap from the flat tire, use your lug wrench to loosen all of the lugs on the flat tire. To loosen each lug, turn them clockwise until they begin to move easily.
In some cases, this action may require a great deal of force, including utilizing your foot or your entire body’s weight to break its resistance.
Do not remove the lugs off of the tire completely, loosen them only by as much as 1/4 to 1/2 turns. You will complete the entire removal process when it is time to remove the flat tire from its wheel.
7. Lift the Vehicle off of the Grounds with the Jack
Pay close attention to where you position the jack under your vehicle. There is a clearly defined area under the vehicle’s frame that is made of exposed metal, and it is designed specifically for placing your jack securely.
Your owner’s manual will provide the instructions that required to find the right place. To avoid unnecessary damage to your vehicle, you must read and follow these directions exactly as written.
8. Raise Your Vehicle with the Jack
To keep your jack from coming off balance or settling under its own weight, place wooden blocks (size about 2 x 6″) underneath it. This step is essential, particularly if your vehicle is standing on asphalt.
Also, once your jack is securely placed in the proper position, use the jack to raise the vehicle up off of the ground (approximately 6″) before you stop. If you are using a scissor jack, place the rod over its knob and then begin to crank.
Special Note: When performing this part of the process, proceed with caution. Do not place any part of your body under your vehicle, while raising the vehicle off of the ground.
9. Unscrew the Lug Nuts and Remove the Tire
Once your vehicle is off of the ground (6 inches from its surface), remove all of the lug nuts and then remove the tire from the lug bolts completely. Set the tire to side in a secure position so that it will not roll away.
10. Place the Spare Tire on Lug Bolts
Place the tire on the lug bolts securely by pushing it back. The tire should be pushed far enough to see the lug bolts through the rim clearly.
Once you can see all of the bolts clearly, place all of the lugs on by hand. Tighten each one of the lugs manually by hand as much as possible and then use the wrench to secure them.
11. Lower Your Vehicle to the Ground and Replace the Hub Cap
Lower your vehicle down gradually by using the knob on your scissor jack. After all of the tires on the ground securely, use your wrench again to tighten your lugs again. Use all of your body weight to turn the lugs clockwise and then replace all of the hub caps.