How to Change Oil In a Car
Knowing how to change oil in a car on a regularly scheduled basis is one of the most essential parts of maintaining a properly running vehicle.
When you replace the oil and the oil filter, your engine can run without sludge, dirt, debris and other particles damaging or limiting its overall performance.
You can save money by getting the best possible mileage on your vehicle, too.
For those of you who do your research, you may also find a host of other awesome benefits, including extending the life of your vehicle.
Having said that, here is a step by step guide on how to change oil in a car.
Materials Required:
- Oil
- Replacement drain plug washer (depending on application)
- Oil filter
- Vehicle’s Owners Manual
Tools to Change Car Oil
- Funnel
- Latex gloves
- Jack and jack stands or ramps (optional, depends on ground clearance)
- Wrench to remove drain plug (box end or socket)
- Oil filter wrench
- Oil drain pan
Types of Oil
Before running out to your local auto parts store to purchase the oil and other items that you need, review your vehicle’s owner’s manual to find the right oil type and the number of quarts for your particular vehicle.
Your owner’s manual will advise you on the exact types of oil (i.e. 5W- 30, 5W – 20, etc.) required and the number of quarts needed to refill the oil level in your engine.
Always follow the owner’s manual recommendations closely, particularly if they instruct you to buy synthetic oil for your vehicle.
Step-by-Step Guide on Changing Car Oil
After you gather all of the supplies and tools that you need to change the oil in your vehicle, follow this step by step guide that’s provided below.
1. Prepare Your Vehicle for the Oil Change
Do not start the process of changing the oil in your vehicle until the engine in the car is at a warm temperature.
As a general rule of thumb, the engine should not be too hot or too cold (i.e. about 100 degrees or run a cold engine about 2 – 3 minutes).
Once the car is warm, use the appropriate safety practices to raise the car from the ground for better access to the drain plug underneath your vehicle.
Again, refer to your owners’ manual for instructions on how to jack up your vehicle, particularly since not all jacks and jack stands are operated with the same procedures.
2. Locate the oil filter and drain plug
Once your vehicle has been raised safely off of the ground, locate the oil filter and the oil drain plug. Most vehicles are designed with bottom-mount screw-on filters.
However, to find your oil filter and oil drain plug, check your manual for the exact location on your vehicle.
Next, place the oil drain pan underneath the oil drain plug. Then, remove the oil drain plug with your oil filter wrench by turning the plug (i.e. nut) counterclockwise.
When the oil drain plug has been completely removed, all of the oil from your engine can fall freely down into the oil drain pan.
3. Put on Your Latex Gloves and Remove the Oil Filler
To keep things from getting too messy for you, put on your latex gloves before you remove the oil filter. Use an oil filter wrench to remove your oil filter from its position.
In most cases, this filter will come right off with ease without requiring special tools or extra procedures to take it off.
4. Install the New Filter
Once you remove the old oil filter, install the new oil filter by spinning it on gently. Keep spinning the new oil filter on until the O-ring connects with the sealing surface and then tighten it with about 3/4 of a turn.
Check your owner’s manual to determine the exact amount of turns for your vehicle.
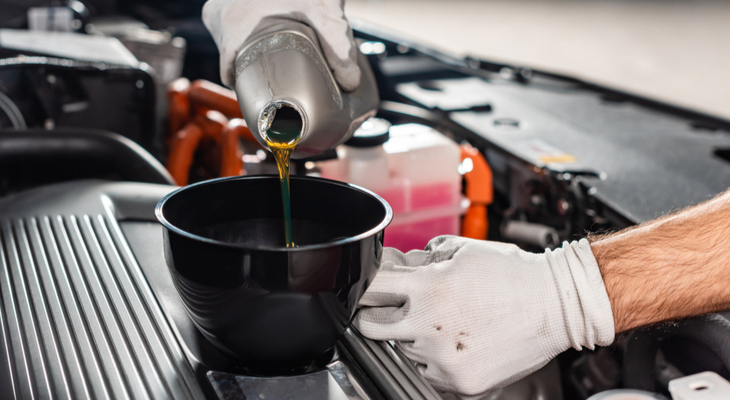
5. Add the new oil
Double-check the oil drain bolt and the oil filter for its proper positioning and then add the new oil with your oil funnel. If your vehicle requires 6 quarts, add one quart less than recommended.
For some vehicles, one quart less is highly recommended to avoid overfilling and the possibility of causing damage to your engine. The sixth quart of oil can be added later when the oil level is lower.
6. Lower Your Vehicle and Check the oil level
Once you add the new oil, lower your vehicle to the ground. Then, turn on your vehicle for about 30 seconds. Running the engine will give the oil a chance to circulate.
Check your oil level to see if it is full by looking at the hash mark and the upper hole.
Special Note: As a general rule, the oil level should not be above the upper line. This indicates the oil level is overfilled.
Bottom Line
Changing the oil on a regularly scheduled basis has many essential benefits.
From improving your gas mileage to extending the life of your engine, all you have to do is comply with the manufacturer’s recommendations for a clean-running engine.
Once you gather all the materials and tools that you need for your oil change, the entire process of “how to change oil in a car” should take about 30 minutes to complete.